My Winter Horse Keeping Method


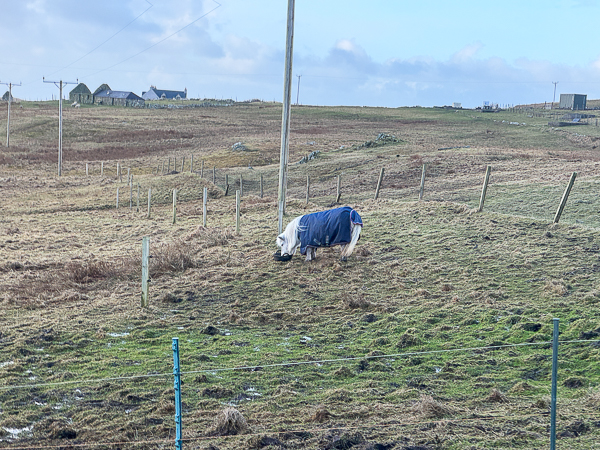
The old folk – that is Haakon, Kolka, Iacs, Vitamin and Fivla – are doing well.  They live at the bottom of a rather steep and slippery hill in the field that is inside the track.

My Winter Horse Keeping Method

This field hasn’t been grazed for two years and is a naturally sheltered valley too, so they can get out of the wind if they want.

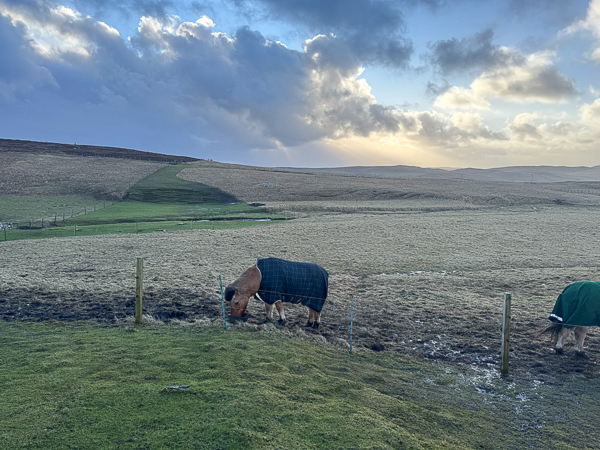
Everyone is wearing a rug and the difference has been huge in so many ways.

No one is miserable, shivering or cold.  They just eat, most of the time or rest.

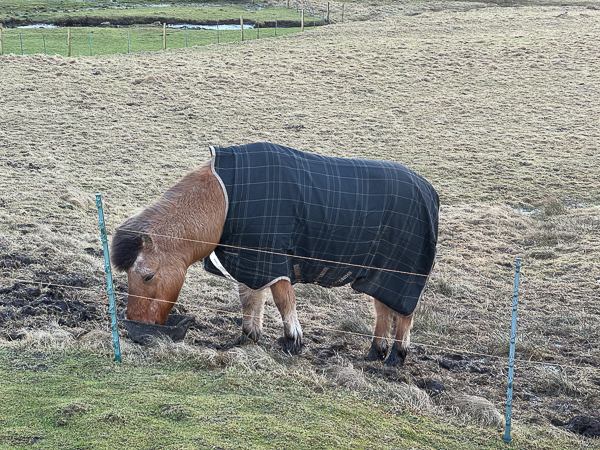
So far, they have kept their weight on and I am very pleased about that – weight maintenance in winter is a constant worry.  The field is holding up well too and hopefully we will get a few more weeks out of it before I move them again.  I don’t want to over-graze as I think it will be useful again next winter.

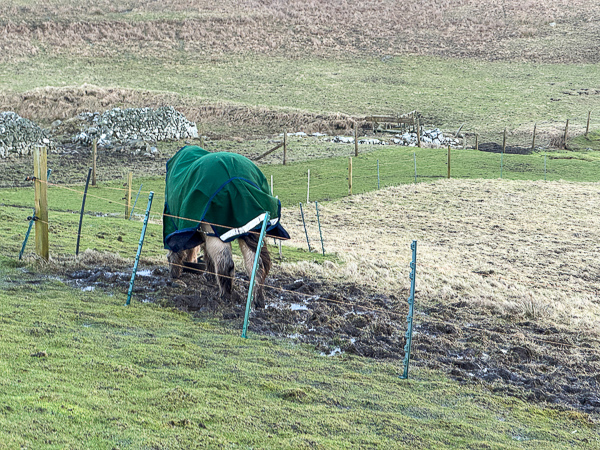
Keeping everyone outside as much as possible has meant the old horses and ponies are much healthier and “normal”, if you know what I mean. Yes, there is the routine of breakfast but no one is hanging around after looking miserable and wanting to come inside (unless it is beyond vile and then obviously they’re in).  When it rains, I don’t worry.  Their state-of-the-art high neck rugs (and am buying for the old ladies and Tiddles too) are doing the job perfectly and mentally, I think I can see a huge positive change because no one is struggling.

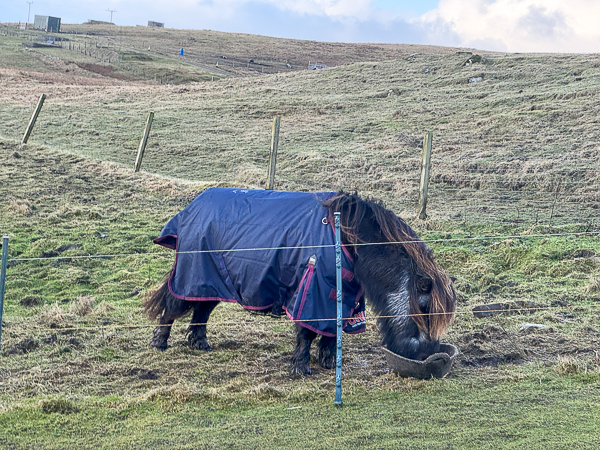
I have decided that this is the best way to keep them in the winter.  Loads of food and good rugs, preferably with high necks (that makes such a difference). The minute anyone can’t cope with this regimen and just wants to be inside all the time, then I will just have to think again.  But, for the time being, it is working.

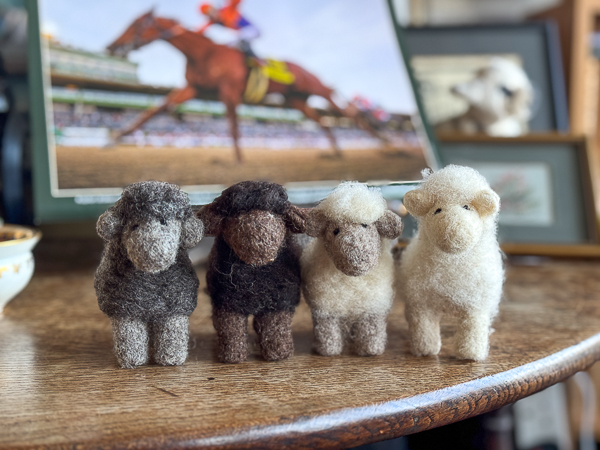
Anywho, today’s ouvrage!
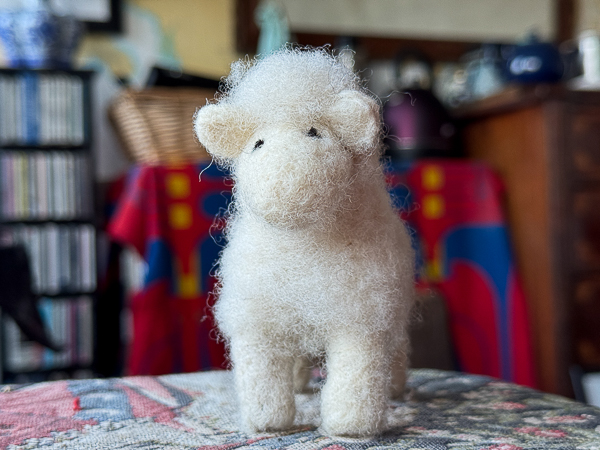
To join les autres.


Discover more from My Shetland

Subscribe to get the latest posts sent to your email.


Cat Reacts to Being Brushed in Viral Video – CatTime


Instagram user @flint.themainecoon shared a hilarious video featuring a cat named Flint, who treats a brush like the main villain of his life. The polydactyl Maine Coon kitten rejects his owner’s attempt to groom him. He does so strongly, sometimes standing on his hind legs to intercept the brush, swatting it, and biting it, as if doing so will prevent his owner from brushing his fur. But the owner does not assume defeat and keeps brushing the cat despite all struggles.

Cat is not a huge of fan being brushed

In the caption, the owner writes, “Ask me how brushing is going,” while the hilarious video shows the owner trying their best to run the brush through the cat’s hair. But it is no surprise that Flint would reject the brush, considering feline skin contains hypersensitive receptors. Repetitive friction can cause sensory overstimulation. Thus, the cat reacts with biting, kicking, and scratching to neutralize the stimulus, which is a biological response.

Viewers could resonate with the cat’s behavior. One viewer responded to the owner’s caption, joking, “Looks like it’s going ‘as expected,’” while another noted the mechanics of the polydactyl cat, writing, “He’s throwing hands! Yes hands as he has thumbs!! What a handsome boy! 10/10!”

Commenters even offered solutions to avoid another chaotic brushing session. One viewer advised, “Try a dual brush method. We have 1 brush for our cats to sniff, rub on, and attack while the other brush is actually working on them,” while another observer agreed with, “Amateur!!! You get 2 brushes.”

Meanwhile, others could not help but notice Flint’s nature, with one viewer writing, “He is so fierce.” Another added, “That’s an ‘absolutely not today or ever’ from the cat!!!!” while one commenter warned about future grooming problems, “It’s going to be even more fun when Flint’s nail’s need trimming!” And, well, judging by the cat’s hostility towards the brush, one can only expect him to throw a complete tantrum when nail clippers come into the picture. 


Over 50 Dogs Rescued from Horrific Breeding Farm Need Emergency Medical Care | The Animal Rescue Site


Over 50 Dogs Rescued from Horrific Breeding Farm Need Emergency Medical Care

Our partner Under the Sun Animal Shelter, Krystina Drahomaretska, took in 54 of the 80 dogs she helped rescue alongside police and other rescuers from heartbreaking conditions at a breeding farm in Ukraine. 

The dogs are scared and desperate for love after living in squalor in cramped cages for their entire lives and used repeatedly for breeding. They need your support to get life-saving medical care. 

Photo: Under the Sun

They are matted, covered in parasites, and in need of nutritious food. Many are also suffering from painful dental disease and ear infections.

Photo: Under the Sun

Some are fighting for their lives against deadly infections like pyometra.

Photo: Under the Sun

A couple of the larger dogs were kept in such tiny crates that they have muscle atrophy and struggle to walk. 

Photo: Under the Sun

Just when rescuers thought they had seen the worst at the farm they turned the corner and found more horrific conditions that dogs were forced to live in. 

Photo: Under the Sun

The focus now is on the rescued dogs and giving them the care they have needed for so long. They are at a clinic being treated by a vet, but the road to recovery will be long and expensive.

Photo: Under the Sun

They have lived their entire lives in unsanitary and unsafe conditions that look like something straight out of a horror movie. It is a miracle they have survived.

Photo: Under the Sun

Donate today to give these dogs a second chance. 

Andrea PowellAndrea Powell

Andrea Powell is an animal enthusiast who resides in West Michigan. When not writing, she is exploring the great outdoors with her dogs and horses.

Read more articles by Andrea Powell.


How to Build a DIY Light Tent for Product Photography Under $10


How to Build a DIY Light Tent for Product Photography Under
© Autodesk Instructables
Source:

A DIY light tent costs under $10 and takes about an hour to build. The result is functionally identical to what commercial light tents sell for $30 to $80: a white-walled diffusion box that wraps a product in soft, even, shadow-free light from multiple directions at once.

How a Light Tent Works

A light tent surrounds a product on three or four sides with white diffusion material. Light sources placed outside the tent pass through the diffusion walls, bounce around the interior, and reach the product from multiple directions simultaneously. The result is soft, wrapping light with minimal specular highlights and almost no directional shadows.

This solves two problems that plague improvised product photography setups. Glossy surfaces reflect the white walls instead of the surrounding room, eliminating distracting environmental reflections. Matte surfaces show clean, even texture without harsh shadows cutting across them. The light tent does this automatically, with no modifier placement, no power ratio juggling, and no post-production shadow removal.

Before building, the product photography guide and best camera for product photography are worth reading for context on how a light tent fits into a broader product workflow.

Build 1: Cardboard Box Light Tent (Under $10, Under 1 Hour)

This build requires a cardboard box, white tissue paper or tracing paper, white poster board, and two desk lamps. Everything except the box comes from a dollar store.

Materials

  • Large cardboard box (minimum 18 inches on each side)
  • White tissue paper or tracing paper
  • White poster board or foam board (background sweep)
  • Masking tape or gaffer tape
  • Box cutter
  • Two desk lamps with daylight-balanced bulbs (5000 to 5500K)

Construction Steps

  1. Cut three diffusion windows. Lay the box on its side so the open end faces you. Cut large rectangles from the top, left, and right faces of the box, leaving a 2-inch cardboard border around each window for structural support. The front of the box stays fully open as your camera opens.
  2. Cover each window with diffusion material. Cut tissue paper slightly larger than each opening. Tape it taut across the outside of each window. Any sags or wrinkles create uneven diffusion and visible variation in the interior light. Two layers of tissue paper further soften the output if your lamps are very bright.
  3. Create the background sweep. Slide a piece of white poster board into the box from the front so it curves from the back wall across the floor, creating a seamless horizon-free background. Tape the top edge to the back interior wall. The board’s natural stiffness holds the curve.
  4. Position your lights. Place one lamp on each side of the box, aimed at the side diffusion windows from outside. Keep lamps roughly level with the center of the box. Use matching daylight bulbs. Mixed color temperatures create color casts that are difficult to correct in post.
  5. Camera setup. Mount on a tripod centered in front of the open face. Shoot in manual mode to maintain consistent exposure across a product shoot. Start at f/8 to f/11 for full product depth of field, ISO 100 to 200, and let shutter speed float to meter correctly. Desk lamps typically require 1/30 to 1 second, so a tripod is essential. Lighting for white background products is a useful companion for the specific exposure decisions involved.
Cardboard Box Light Tent
© Autodesk Instructables
Source:

Build 2: Collapsible PVC Frame Light Tent (Under $20)

The cardboard version is fixed in size and awkward to store. This version uses PVC pipe and white fabric panels secured with binder clips. It disassembles flat, adjusts to different cube sizes, and the fabric can be washed and replaced.

Cut a 3/4-inch PVC pipe into 12 equal lengths. A 16-inch cube suits most small products. Connect the pipes using 90-degree elbow connectors at each of the eight corners to form a cube frame. Drape white cotton or ripstop nylon fabric over the top, left, right, and back faces and clip it to the frame with binder clips. The front stays open. Slide a curved foam board sweep inside as your background.

The whole frame disassembles in minutes and stores in a bag. Setup time after the first build is about 10 minutes.

Lighting Placement and Adjustments

Two side lights are the standard setup and cover most product types. Understanding what adjustments change the result gives you creative control over the output.

  • Third top light: Adding a lamp through the top window lifts overall brightness and reduces darkening on the top faces of taller products.
  • Uneven side lights: Placing one lamp closer than the other creates a slight directional character, with one face brighter than the other, which preserves the sense of depth and surface texture that flat, even light can flatten out.
  • White foam board at the front opening: Placing a foam board reflector just below the camera opening bounces light back under the product, eliminating shadow under overhangs or the product base.

Backgrounds and Surfaces

White poster board is the standard for e-commerce and catalog work. Switching the sweep changes the entire mood of the shot:

  • Black foam board: Gives a premium, luxury feel. Works well for cosmetics, watches, and electronics.
  • Colored poster board: Instant brand-matched backgrounds without any post-production.
  • Natural textures: A wood plank, slate tile, or folded linen fabric as the floor surface gives lifestyle product shots an editorial quality suited to food, artisan goods, and home products. DIY backgrounds for product photography offer a range of textured options that work at a small scale.

Food Photography Inside a Light Tent

Standard light tent output, which is even all-direction wrap light, is generally wrong for food photography. Even light flattens texture and removes the sense of moisture and depth that makes food images compelling. Most food photographers use directional light, where a single strong source comes from the side or back.

The fix inside a light tent is blocking one side panel entirely with black foam board. This turns a three-source box into a one-directional setup while keeping the background and environment under control. The result is directional light with a controlled, neutral background, exactly what commercial food photography relies on.

Black DSLR camera on tripod showing LCD screen displaying food photography of yellow apple and orange garnish with camera settings visible in viewfinder.

Fixing Hotspots

Hotspots are bright circular patches visible on diffusion panels when a lamp shines too directly through a thin single layer of tissue paper. Three fixes, in order of simplicity:

  1. Add a second layer of diffusion material over the affected window.
  2. Move the lamp farther from the box to spread the beam before it hits the diffusion.
  3. Switch to a frosted bulb rather than a clear one.

If the left and right walls inside the tent show noticeable differences in brightness, the lamps are at unequal distances or angles. Measure and match them exactly. A light tent fits naturally into a home studio setup alongside backdrops and other DIY modifiers.


Video: Stray Cat, Now Adopted, Reacts to Owner Coming Home After 3 Days – CatTime


Three days doesn’t sound long. But apparently, it is indeed long when you’re a recently adopted orange cat waiting at home. The guy behind @the_island_keeper just got back from a short trip. And this video shows exactly what happens when his cat realizes he is finally home for good.

She climbs right onto his chest the second he hits the couch. And she is not moving. She used to be a stray. So maybe she was just making sure he was real? Either way, she is making her feelings very known, and it is adorable.

Cat stares at owner after being away for 3 days

Her dad is just sitting on the couch with his laptop open. But Mousi isn’t having any of it. She climbs right onto his lap and demands attention immediately. He starts petting her, and the laptop is basically forgotten. “I adopted Mousi 3 month ago and I left her first time 3 days alone,” he says. It was their first big test apart. And it turns out the bond is already huge.

The clip cuts to her sitting on his chest. She looks so happy to be reunited. They are just staring at each other. Seeing this cat at home in the video gives off that vibe where they decide you belong to them. He rests his face against her fur, and you can tell he’s just as obsessed. The text on screen says, “I recently adopted her, I didn’t know cats could miss you like this.”

It’s her first time being the most important thing to someone, and she’s leaning into it. One commenter said, “Yes, they do love totally and with all their hearts.” She climbs even higher to perch on his shoulder. “She loves to sit on my shoulder,” he notes. It’s her favorite spot. Another viewer pointed out, “What a daddy’s girl!!! You are a lucky man.”

The whole thing has over 36K likes, and people are just melting. “Aww kitty missed her daddy,” someone wrote. He just holds her in this big embrace while she stares up at him lovingly. “Does your cat do this too?,” he asks while his home is filled with purrs in this video. He is still figuring out this whole cat dad thing. And the internet is here for it.


In the Age of AI, DIYP Goes Back to Basics: Human Connection and Building Community


In the Age of AI, DIYP Goes Back to Basics: Human Connection and Building Community

A few days ago, we talked about AI, creativity, and something that feels increasingly rare online – genuine human connection, experiences, and creation. Sure, AI can be useful and fun (at what cost, though?). But it can’t replace lived experience, shared emotion, or the chaotic, beautiful process of being human. Especially a creative human.

And as of today, we’re not just talking about it. We’re doing something about it.

This Friday, DIYP is opening user registration as we aim to exchange ideas and opinions with you: real users, real humans, real creators. And that’s just the first step.

Why Registration, Why Now?

Over the years, the internet has changed. If you’re around my age or older, you remember forums and endless exchange of opinions and experiences with other people (and occasional trolling, of course).

As social media, algorithms, and ultimately AI entered the chat, we realized that it’s becoming more difficult than ever to just have a conversation with someone online and keep having conversations with them in a meaningful way. In an era of AI summaries, bot comments, scraped content, and engagement farming, it’s getting harder and harder to connect to real readers. And we miss connecting with you and reading your thoughts. After all, you read ours.

If we’re going to keep talking about protecting human creativity and human experience, we need to build a space centered on actual humans talking to each other.

What’s Changing and What Are You Getting?

Starting Friday, February 27, 2026, you’ll be able to register on DIYP.

Registered users will:

• Be verified as human
• Have a profile page
• See what they’ve commented on and interacted with
• Become part of a visible, growing community

For now, you won’t notice much difference, other than being able to register, log in, and have a profile page. And on each profile page, you’ll be able to see which articles they’ve posted, commented on, or replied to. It kind of reminds me of a crossover between the old Facebook “Wall” and a forum, and it gives me different layers of nostalgia and joy.

But Wait, There Is More

We’re starting with registration as the foundation. We wanna interact with humans and read their comments. As the community grows, we will start building features only they can use. We can only give you a teaser for now, but we plan to expand and interact with you in additional ways than just comments under DIYP posts.

Speaking of posts, they will always stay there, available to anyone – you won’t have to register in order to read them. But if you want to comment, you’ll have to create a profile and join our little online village.

This registration move is us putting our money where our mouth is. We want real photographers sharing real experiences. We’re even cool with disagreement and criticism (as long as they’re not downright insults). Even some trolling is okay, bring it on, we’re old-school. 🙂

In short, we want imperfect, passionate, occasionally chaotic discussions between people who care about what they read and what they interact with.

We’re a little tired of AI being in all pores of the internet. We miss simpler times and more complex human interactions. Maybe that means we’re old – or maybe we’re just fed up and scared of the direction the world is moving towards.

All in all, we’re happy to welcome you here, with all your thoughts, opinions, experiences, and with whatever you have to say.

Welcome aboard!


Adding smoke back into your images in Photoshop 


In this Photoshop editing tutorial, I take you behind the scenes of an Ophelia-inspired portrait edit featuring model Skye Medusa, showing exactly how I rebuilt atmosphere when real-world conditions did not cooperate. You will see how to clean up small distractions, remove specular highlights, and realistically add smoke back into a portrait using overlay techniques, blending modes, masking, and Generative Fill in Adobe Photoshop. I walk through capturing practical smoke plates on set with a Telesin mini fogger, then compositing them seamlessly so lighting, texture, and perspective all match. From there, I finish the image using Aperty for fast, natural skin retouching, colour balance, and detail control, followed by a final colour dodge and burn to add depth and focus. This video is ideal for photographers who want to fix on-location issues in post, learn practical smoke compositing, and refine cinematic portrait edits without relying on gimmicks or presets.

Check out these other videos on YouTube

Grab a special Telesin 15% discount use code JULIEPOWELL including the mini fogger