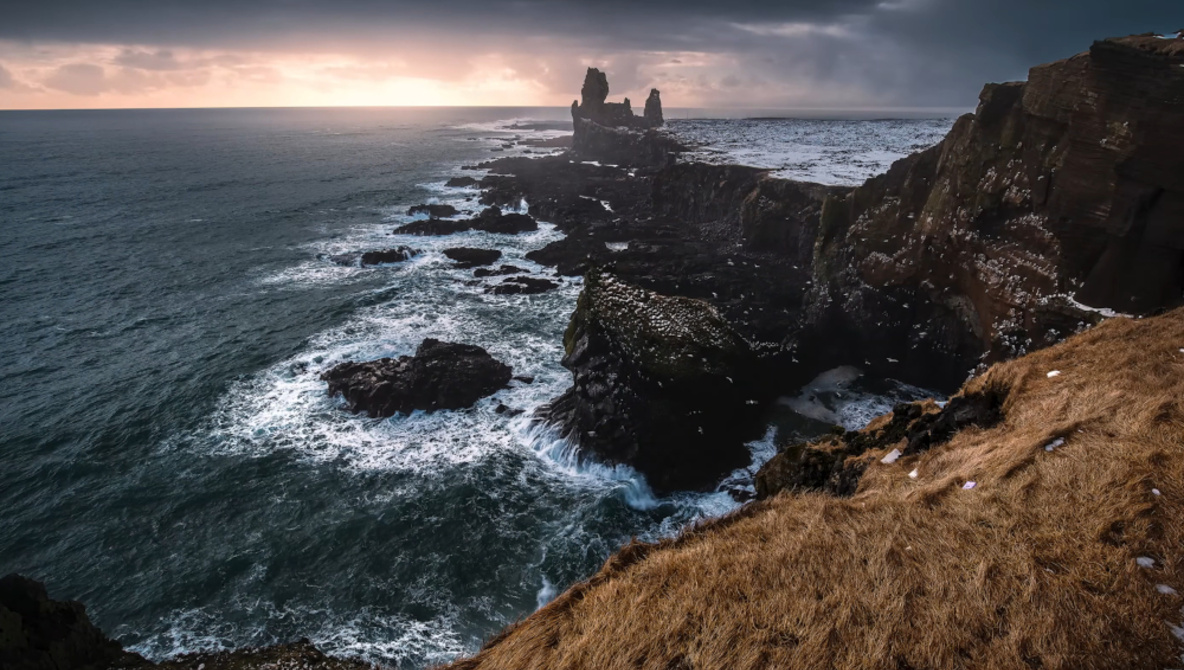
Turning a flat landscape raw file into something moody and dramatic is often the difference between an image you forget and one you remember. When you see how far a single frame can go in Lightroom with careful cleanup, masking, and color work, you start to rethink what is actually possible in post.
Coming to you from Christian Möhrle – The Phlog Photography, this practical video walks through a full start-to-finish edit that takes a quiet scene and pushes it into a much darker, more dramatic look. Möhrle begins in a place many people skip: cleaning the file before doing any creative work. He uses Lightroom’s Remove tool with the dust option to automatically clear a large number of sensor spots, then switches to generative AI to brush away small figures on a ridge so the landscape stands on its own. Watching that process shows how much time you save by letting the software handle repetitive cleanup while you focus on the mood of the scene. He also shows how doing this first keeps you from discovering ugly dust blobs only after you spent time on detailed color and contrast adjustments.
From there, the video moves into the Basic panel to build a dark, low-contrast starting point that will support heavier local edits later. Möhrle lowers exposure and pulls highlights all the way down to control the sky and bright water, then gently lifts whites and shadows to avoid crushed blacks while still keeping the frame overall quite dark. He warms the global white balance more than you might expect, knowing he will cool down specific areas with masks later rather than relying on one temperature setting to do everything. Texture, clarity, and a moderate dose of dehaze add punch and microcontrast, while also nudging colors toward cooler blues in the distance. By the time he toggles the before/after, you already see a serious shift in mood, even though most of the impact is still to come in the masking steps.
The heart of the tutorial is how he uses Lightroom’s masking tools to separate the scene into logical pieces and control light, not just exposure values. Möhrle leans on the Landscape masks to grab vegetation in the foreground and give that grassy patch more clarity, brightness, and contrast so it becomes a defined entry point into the frame. For the sky, he builds stacked linear gradients, subtracts the mountain selection to keep edges clean, and then cools and darkens the upper sky while guarding against overly saturated blues. A pair of radial gradients creates an intense glow on the left side of the image: he reduces dehaze, raises blacks and exposure, and warms that area so it feels like a strong light source behind the rocks rather than just a bright patch. He also hints at how you can repeat this logic on other images, treating glow and shadow as shapes you place and refine with masks instead of simple global sliders.
Later in the video, Möhrle targets the rock faces, fast water, and a snow patch on the right with separate masks so each element sits in a deliberate tonal and color range. The rocks gain clarity, whites, and brightness so they read as crisp structure against the soft background glow. The water gets darker shadows, added clarity in the white water, and a cooler temperature with extra saturation to pull out rich blue tones, followed by a color range mask to keep the brightest foam clean and white. The snow patch is cooled and desaturated so it looks like actual snow instead of a yellowish blob, which also helps balance the warm glow in the opposite corner. To finish, Möhrle moves into the Color Mixer, split toning, and calibration to fine-tune oranges, yellows, and blues, then dials in sharpening with careful masking so detail hits rocks and texture without roughening smoother areas like sky and glow. Check out the video above for the full rundown from Möhrle.


